September 14, 2011


 When you use the "distort" command, you will get 4 small squares at the 4 corners of your photo.


 You can hide the starting image (background) by pressing on the "eye" of the background


Another Building


Using Photoshop for Architecture
(Distortion Correction)
Photoshop offers the architectural photographer a vast array of menus and sub-menus for correcting distortion. Distortion occurs when wide-angle lenses lens are used or the camera is pointed up or down on a building. In both cases, what happens is that part of the building will be closer than the other (top to bottom, or left side to right side). As a consequence, parts will photograph as larger, while other parts will photograph as smaller.
I've chosen a photograph that presents a huge amount of distortion. It's a beautifully-restored old building in Old Montreal, Quebec, Canada. That's the great city where I live.
Wide-Angle Lens Distortion
Because the lens is pointed up, the bottom of the building will be closer to the lens than the top. As a consequence, the top is smaller, and the building no longer is rectangular, but is trapezoid.


Adding a Grid
A grid is simply a pattern of squares that is added over an image.
Using a grid will help to show the distortion against the grid (used a a reference).

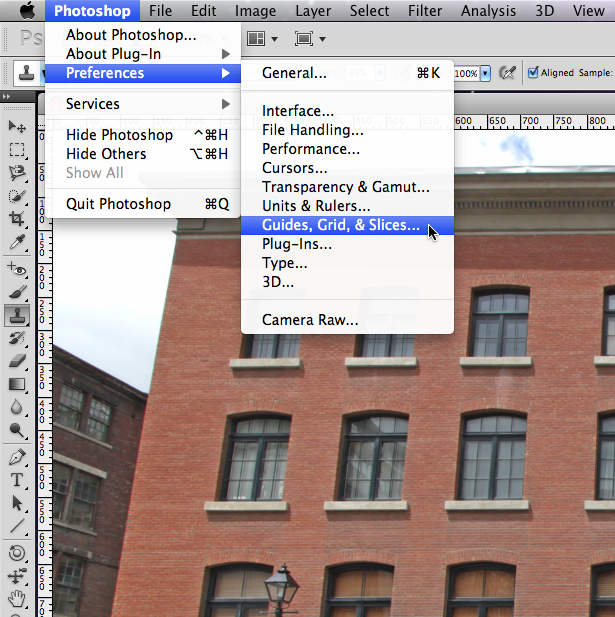
Customizing your Grid
OPening the above menu, allows you to adjust the grid

The Grid Adjustments
This menu allows you to change different elements of the grid. You can "play with" this feature to see what it does.

The Grid
This grid was done with the settings in the previous image.
The grid squares appear every inch and are halved in 2 (e.g. 2 subdivisions).
The colour is red. The Style allows you to create a dotted line or some other option.
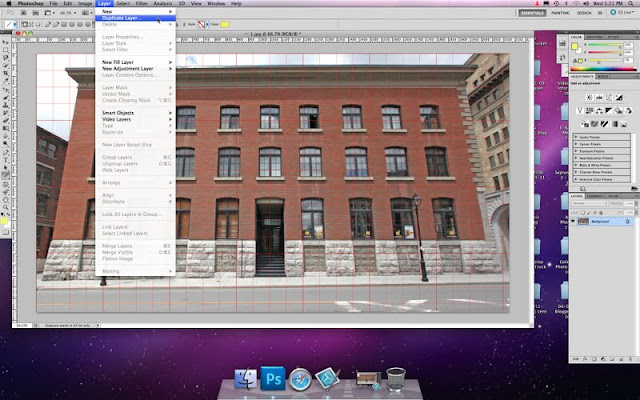
The "usual" Image >> Duplicate Layer
 This is done in order to work on a copy, so you don't accidently destroy the original.

The "usual" Image >> Duplicate Layer


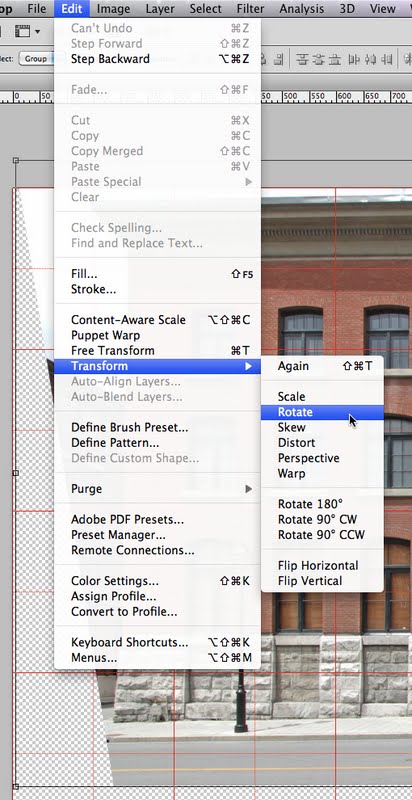
Commands: Edit >>Transform >>Distort
The "distort" command is a good function to start with.


The Edit Menu is used with a
sub-menu of transform>>rotate

An enlargement of 1 of the corners

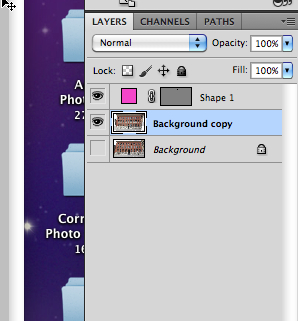
The window menu on the right side of Photoshop
Notice the "eye" Icons

With both "eyes" showing, you can see both the background and background copy images.
This can become confusing and distracting!


The actual "tilt" up close
Notice that only the background copy image appears.
The checkerboard in the back is nothing.
You can see how the top roof edge is tilted and arced.
The "rotate" command will help first with the top

This is the "puppet warp" command
It allows you to readjust parts of the images, and is more versatile than "distort".

An enlargement of the "puppet warp" window
The Grid that appears after you enter the "puppet command.
The yellow circle is called an "anchor point"
You add 4 of these points in order to keep 3 parts in 1 place, as you pull or push the remaining anchor point/

Top Distortion - Before Puppet Warp

Close-Up of Improvements - After Puppet Warp

The Overall Image

You need to get rid of the original layer image in order to save the new layer" that was worked on.

Here's a prompt asking you if you want to discard "hidden" layers.

The Original Image

The Final Image
I framed the image very close in order to better show you the flaws and improvements.
In a contract, I would have left the side buildings in order to present the building in an environment to show the context of where it was.
Another Building
Here is another building to illustrate how to correct distortion for a building using Photoshop.

The Un-retouched Image

Removal of the seated cyclist

Straighten the Verticals
Brighten and add contrast the Image

Focus on the building by removing some unnecessary portions of the image

The Final Image
No comments:
Post a Comment