Tuesday, September 26, 2011
Please have a look atthe Bibble Site!
Please have a look atthe Bibble Site!
Bibble 5Image Management Software
I was searching the Net to find what to write about today, and my search focused on other image management softwares. I went to another site that reviews softwares, and lo and behold, I came across Bibble 5. Bibble 5 is an image management sofware. It's like Lightroom 3, Aperture 3, or Capture One Pro 6.
Just for reminders, an "image management software" is a combination retouching/catalogue software. You can do retouching and correcting to some extent, as well as creating a library system to store your images and then retrieve them at a later time.


Just for reminders, an "image management software" is a combination retouching/catalogue software. You can do retouching and correcting to some extent, as well as creating a library system to store your images and then retrieve them at a later time.
Bibble's Logo

Storing Your Photos
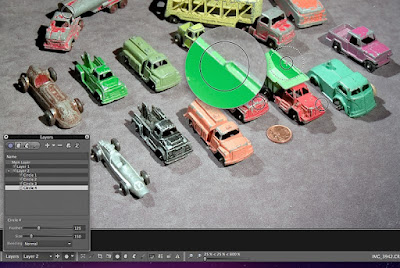
Bibble starts off with the creation of a folder and catalogue for your images

The Opening Window

The left side menus

The left, middle and right menus and whole window

The right Side
This is one of many menus to be found on this side

Opening an Image

The Enlarged Middle Window Area

You can work with many photographs at once
as a "batch". I haven't worked on this part yet, so please wait till I corroborate that that's what it does.
Here is where the photos will be placed

The Upper Menus and Buttons
The upper menu allows you to rate your images with both stars and colours.

This upper area allows you to view your catalogue or file of images and the working and enlarged centre image in different proportions of ratios of small images to larger working image.

One Choice of the Working Window

The Colour Identification

You can enlarge the smaller images

My typical reddish/magenta colourcast

Automatic Colour Correction Function
This worked well!

The Close-Up Tool (Before Noise Reduction)

The Close-Up Tool (After Noise Reduction)

You can create many Enlargement Points That You can Return to Later

Another Enlargement

Just the Colour-Corrected Image

The Same Image with the Fill Light
The "fill" didn't lighten the deep shadow behind the black tire.
It most likely was too dark to work with.
However, a noice job was done on the tire itself.

An Enlargement - Before

The Same Enlargement- After the Fill Light was Used

Image Before Sharpening

Image After Sharpening

Image with Noise Reduction

The History Recorder
This is an interesting feature that is worthwhile.
When I was working on this image, I tried to test a lot of menu controls.
It's a excellent feature to have.
Another feature that most of us take for granted is software support.
When you have a blog, it's constantly evolving. Also, when I create a post, I might return to the software that I'm writing about just to work on it more. I did just that, and couldn't remember how I managed to get an automatic colour correction. So I decided to go to the Bibble site and search out documentation. I found what I was looking for with a brief search, and then downloaded one of their PDF files on the program. Their address for documentation is:
http://www.bibblelabs.com/products/bibble5/learn/
This is certainly another another very good feature. Also is written quite good. When I write, I try to keep the writing simple for everyone to understand.
I decided (stubborn as I am) to try and figure out how to correct colour-balance, before I went to the documentation. What happened? I found 4 ways to correct the colour balance.

Curves
I went to the curves menu, then used the little arrow to select just the red curve.
I pulled it up and down, and realized that the down pull corrected the red colour cast.

Color Balance
I went to the Cyan/Red slider and moved it towards the cyan (opposite of red)
A value of minus 9 (-9) did the trick.

While I was trying to move the photo, I noticed that there were values in the lower right corner that were changing.
When a gray tone is "pure", it should have equal values of red, green and blue.
In the above example , notice that the values are:
R: 104
G: 91
B: 89
What the numbers (values) tell you is that there is too much red!
From here you can then return to Color Balance menu, and adjust the value for red accordingly.

This was the easiest method of colour correction!
Press on the eyedropper, move it to a position on the photo, click, and the red colourcast in the photo disappears!
I've mentioned what I'm about to say on several occasions, and I guess it's worth repeating what I'm about to say. That is, that poor images can only be salvaged so much. If you don't use a tripod and IR (Infra-Red) remote camera shutter release, then you can only expect any software to be able to sharpen your image up to a point. The same goes for dirty lenses, wide apertures
(f 2.8 instead of f 16), and a whole list of other "handicaps" to quality images.
Please have a look atthe Bibble Site!
No comments:
Post a Comment