Friday, September 15, 2011


Photomatix - A Stand Alone or Plug-in HDR Application
Photomatix is a stand-alone or plug-in HDR application. Just to remind you, HDR stands for High Dynamic Range. This is a situation where the extremes of bright areas called highlights, and the dark areas called shadows are too far apart for any camera to record. AS I showed yesterday in my instalment on Photoshop HDR, was that you can "bracket" a series of different exposures from underexposed to normal and then overexposed. You can then enter them in the HDR set-up of Photoshop, and Photoshop will attempt to blend the best portions of all the images in order to show all of the detail. The key word here is "detail", which means the information that can be seen in the photo.

The Opening Web Page of Photomatix

The Photomatix Pro Icon

Step 1: Choose which process that you'd like to work with
I've "played with" the different processes and you can see the results of each later on.
Notice that the opening page comes with a tutorial-Smart!
Notice that the opening page comes with a tutorial-Smart!

Step 2: Open the window

Step 1:

Step 4: Highlight your files

Step 5: Once you select the images, they automatically enter into the above window

Step 6: After Pressing "OK" in step 5, you wait until Photomatix processes your combined image.

Step 6: You can adjust different elements of the image

Step 7: While Photomatix is open, you can try another of the processes that the software offers.
What's extremely resourceful here are several things:
a. This software is quite easy to learn
b. It's all "hands-on"
3. It offers you 4 different ways to try and do the same thing, which is to recover as much detail as possible in an HDR scene.

Step 8: Opening this window will allow you to access the different processes
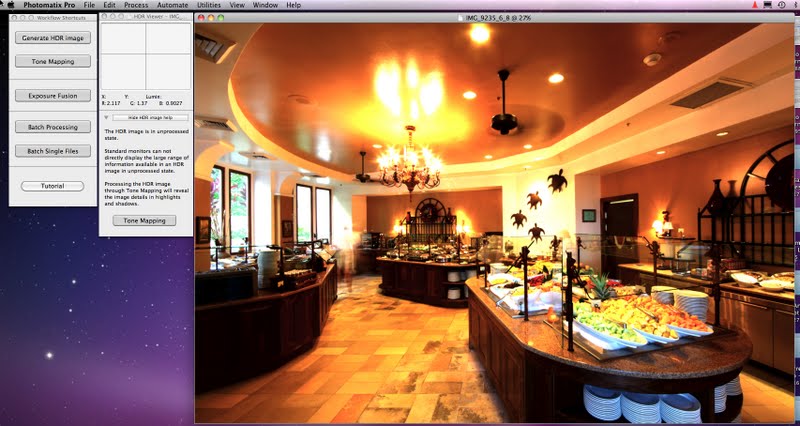
Step 9: The Result of HDR
You get results like this also in Photoshop HDR. However, here, you are warned about this, and then informed that the processing of this image will yield a final different result.

Step 10: The processed result, with the adjustment menu that opened up in step 8

There also is a small magnification square that allows you to see portions of the scene enlarged.
The enlargement results are not accurate, but the enlargement at least shows you what detail there might be in those darker or lighter areas.

This is the final result of tone-mapping which is 1 of the processes that you can choose from.

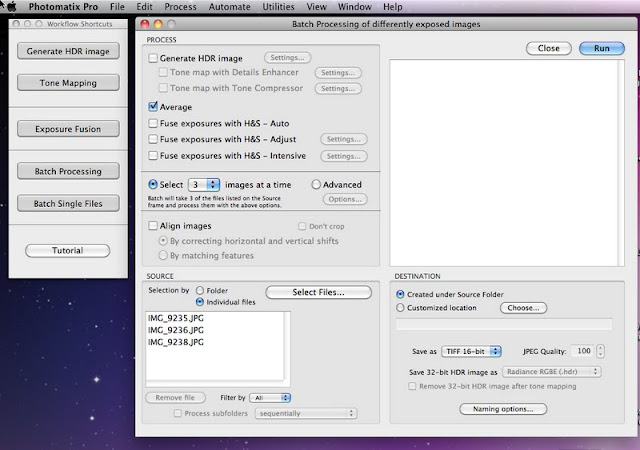
An alternative process to HDR that is called Batch Processing

Within the Batch Processing window menu are again different choices

Here is 1 choice_ Batch Processing with "Average"

This software has been very well thought out.
When the iimage has been processed, a folder automatically appears on your desktop ( I chose that area) with the finished result in it.

Here's a view of 1 of the alternate choices

Still another choice of processing the images

And yet still 1 more choice
The above result is not 100%, but then again, you have a chance to go back and try again and:
a. modify the result
b. choose another process
c. Save the image and take it into Photoshop or 1 of your other image-editing software titles
Conclusion:
I don't like to nor want to compare one software to another, but I'll mention the features of this particular software. It's easy to learn up to a point. You still may need to go to the Photomatix site, or YouTube or search out tutorials. However, you can choose different processes to try and refine the final image. It has been well thought out, in terms of ease of use, a tutorial that comes on the opening window, and several choices to improve your final image. It does cost money, and you'd have to think if buying this software will help you out in what area of photography this might help you. I'm sure if you have Photoshop, you should be able to do all of the things that Photomatix does. However, as a standalone, I find it fast, easy, and it works! I was fortunate to purchase it when I was a teacher (educational price), but if you do shoot lots of photographs under extremes of HDR, then I would suggest that you try a free download.
The address for the download is: http://www.hdrsoft.com/download.html
Give it a try and you'll see what I mean in terms of liking the software and what I described are it's assets.
Also, there are many learning resources and material on the site for you to learn should you have any questions. Part of the material is below.
http://www.hdrsoft.com/support/faq_photomatix.html#tips
No comments:
Post a Comment