Tuesday, September 20, 2011


Photoshop (CS5)
The Basics - Part 1
There are certain procedures that you do when you start working on an image in Photoshop. I'm going to present them to you below. This is what I usually do, but once you get to know any software, by all means do what is best for, or is easiest for you.

1. Open your file

2. Rename your file
You always want to keep the original file and work with a copy.
In this way, you always have "the original".
By re-naming your file, when it is saved, it will be a new file.

3. Your File now has a new name

Here's the photo I'm going to work with.
It's a Hubley P-38 from the early 1960's

The capture command
It's called a Marquis

The dotted square is the command to capture something.
The + is your beginning starting point.
It will appear when you move the mouse on to the photo.
Pressing on the mouse allows you to then pull the mouse.
The "capture area" will expand in the direction that you move.
Moving diagonally will make the square larger in both dimensions (vertical and horizontal)

After you lift the mouse or stop pressing on it,
you will see the dashed black and white line.
This means that you now have a "capture" and can then do whatever you want with it.

4. Apply Auto Color
There is a unwanted warm-toned overall color (reddish-magenta)

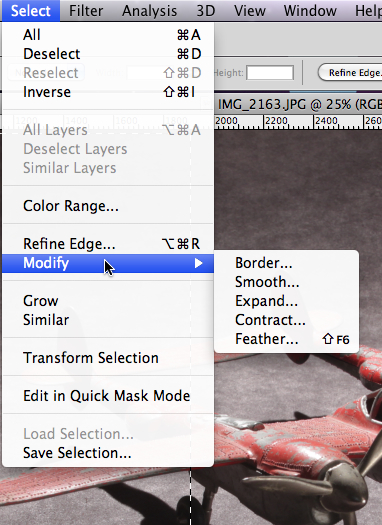
You can make your rectangle larger by:
Select >> Modify >> Expand
What will come up on the window are pixel units.
Experiment with numbers to see how much of the "rectanglular marguis" expands
by adding more pixel units.
If you make a mistake, you can always:
Edit >> Undo
Select >> Deselect and start over
Edit >> Step Backward
* Most softwares, including Photoshop are "hoarders".
They keep almost everything in the program from when the program first came out.
That's why you have so many ways to do the same thing.
Feel free to learn the basics and what you are comfortable with.
Then learn more!
Edit >> Step Backward

The Whole Photoshop Window
with the Auto Color menu

5. The effect of Auto Color
Notice that a menu appears to wjhich you can make adjustments.
You can adjust or cancel,

6. Shadows / Highlights
This command will allow you to have more detail in the dark (shadow) area lighten up,
as well as the areas in the lighter-toned parts (highlights) to darken.

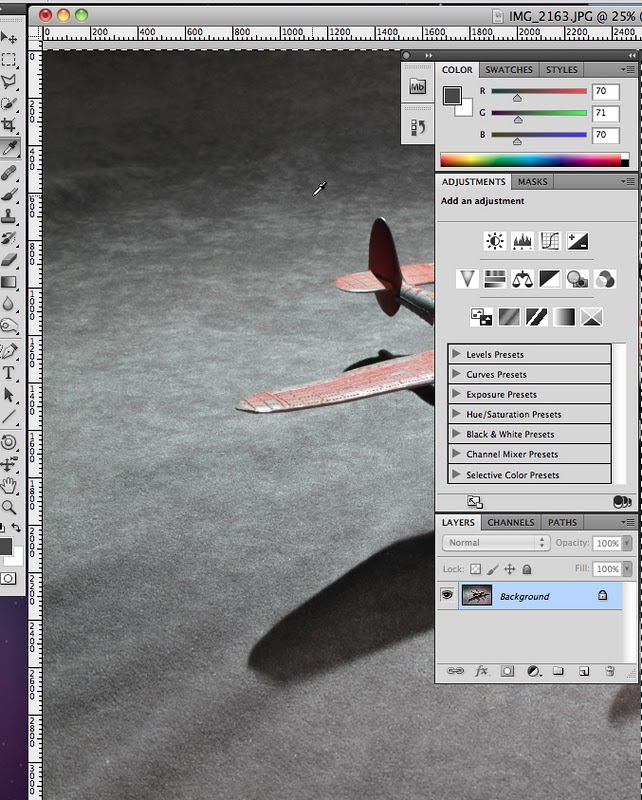
7. The Eyedropper
Notice the eyedropper on the left vertical menu.
It is the 5th one form the top

The eyedropper is showing above the vertical fin.
I've moved the right side menus closer to the eyedroppers.

When you press down on the mouse, a pair of gray circles appear.
They are gray in tone as this is a "neutral" tone.
It has equal parts of Red,Green and Blue (or oppose Cyan.Magenta,Yellow)

The eyedropper will give you numerical values to sample what it is on.
Notice the numbers "before" I corrected the reddish-magenta colour.
By the way, magenta is a "purplish" colour, with it's opposite of green.
Notice the values after I auto color corrected.
You can also move the R-G-B sliders on the upper right menu (above)
but that's a bit more complicated than it appears.
However, try it and move the sliders to see the effects.

Here are the results of:
1. Highlight / Shadow
2. Auto color

Don't ask me why there is a colorcast (unnecessary color in an area) in the shadows.
I have no idea why Photoshop does this!
So I went to my "magnetic lasso" which is like the square marquis.
However, this function works by laying down 1 small pixel at a time for more accuracy.
I'll show you this in another post.

The Magnetic Lasso is just below the square marquis tool
I "captured" the shadow with the reddish color cast.

I brought up the auto color command

I pressed the "Auto Color" command which removed the reddish color (almost!).
I could then try the color "sliders" that I mentioned before to fine tune the remaining unwanted color.
Thanks for visiting today.
If you have any comments, or if you'd like me to write about something, or if you've found an error, by all me please send me an e-mail.
Stacey
No comments:
Post a Comment