Sunday, October 30, 2011

Canon Camera Comparison - T1i with Canon T3i

Sunday, October 30, 2011

Canon T1i  and T3i
Canon Camera Comparison

     I asked Canon USA how to go about obtaining equipment for testing. I got a "slight runaround" from 1 phone reply operator who said that I should speak to someone above him who is in charge of this function. I didn't bother then, and I waited. As luck would have it, I was able to buy a Canon T3i at a very good price. The T3i is an 18 megapixel camera, compared with my current 14 megapixel camera.


     I'll probably send my blog address to the canon person and see if that will help me obtain the equipment to test.

     I don't expect much change in terms of the 14 to 18 megapixel jump, but we'll see when I compare images later.  I haven't spent much time with the camera, as out dog Buddy was I had to take him to the emergency vet. Therefore, I'll be adding to this episode later in November.

  The Canon T1i
Older Model with the Battery Grip

  The Canon T3i
Newer Model

       One of the great decisions that I made was to purchase the Canon T1i battery grip. I like it for 2 reasons. The first is that it gives me a more substantial  "feel" to the camera. The older PDE (Pre Digital Era) camera were substantial in the sense that they had weight and were metallic.  I miss that tactile feeling. Having the grip makes the camera bigger and it's easier to grasp without worrying that it might slip out of your hands! The second reason that I like the grip is that I can shoot 500 dual Raw and 14 Megapixel files and not worry about the batteries going dead on me. Of course, Canon warns you that the battery charge is low before the camera simply stops working.

      I'll spare you all of the specifications for now. If you want to get a better knowledge of a camera, try to rent it from your local pro camera shop if possible. You might want to ask if any rental costs could be used towards the purchase of any camera that you might be interested in.

     In terms of selection, I personally think that most DSLR (Digital Single Lens Reflex) camera are very good or excellent. If you're a "Pro" maybe you need to shoot 10 frames per second in darkness with low noise and an ISO of 12,800,  and then make an enlargement of 32" x 40" (80cm x 100 cm) at 300 dpi,but I don't need to (yet!), and most of us don't  have to. By the way (BTW), I also have this opinion about most cars, that I can afford.
  Here's my first item for testing

  A Cropped Bear Head
File size  is about 5.18 megapixels or .38 Megapixels more. 
However, overall, the image would be 4 megapixels more.

Right now, I'm thinking that there probably won't be a big difference in an enlargement.

You might want to try those programs that boast about increasing the size of a photo without damaging the image quality. I write about this in 1 installment. The caveat is that you need to have a large enough file size for this to work. I'm not "crazy" about these programs, but you can download one and try it out for 10-30 days.

Again though, when is the last time you made anything larger 
than an 8"x10"  (20 cm x 25 cm) enlargement?

  A Cropped Bear Head
The file size  is 4.79 megapixels 

So far, not much difference.

Keep in mind that if you like to upgrade your camera, then it's worthwhile to do so while your current camera is still marketable.  My T1i is still on the market, so if I wanted to sell it, I could still get  60-70%  of its' original value. 

The corollary to this also holds true. If you don't mind a slightly used camera, then if you're going to go from a digital camera (fixed lens, no SLR mirror), then buy a used camera. Of course, do a bit of homework on the camera, and bring a memory card to test the camera out. Better still, if you have a trustworthy camera store in your area, buy a used camera from them.

There's only so much that a camera will do, even as the cameras advance.
DSLRs are like computers. For a fixed amount of money, you are able to buy the next generation or second to next generation camera for the same price.

The next generation of cameras will have better CPU (computer chips) to be able to actually do HDR within the camera itself. They'll also be faster and have more megapixels. Again though, do you really need to have every photo that you take "perfect"? And don't forget how software is advancing.  I have some of the latest software, but I only use about 20-40% of a program for any image that I work on. So the same principal for me might apply. Photoshop CS5 is probably just as good for most people as CS5, and  Photoshop Elements 10 is probably just as good for most of your needs as well. Even less-expensive programs than Photoshop will work, and don't forget, there is GIMP, a free program. Oh, and most cameras come with your basic image improvement software as well.


To Be Continued......


Friday, October 28, 2011

GIMP- A "Free" Image-Editing Software

Thursday, October 27, 2011


GIMP
A Free Image-Editing Software

    There is a free download suite from Oracle (through the former Sun Microsystem which Oracle purchased), called OpenOffice. I've never used it, but it works quite well. It has a word-processing software, a spreadsheet software, and at this moment, I can't recall the third one. Surprisingly, there is also a very good image-editing software called GIMP that is also free. It's from another group of people dedicated to improving the software.


The Downloading in Action
You might want to also download the help files.
The GIMP Icon


When you activate the Gimp logo, a second icon gets placed on the open-software bar at the bottom.
I'm not sure what that is, but the 2 are necessary for the program to operate.

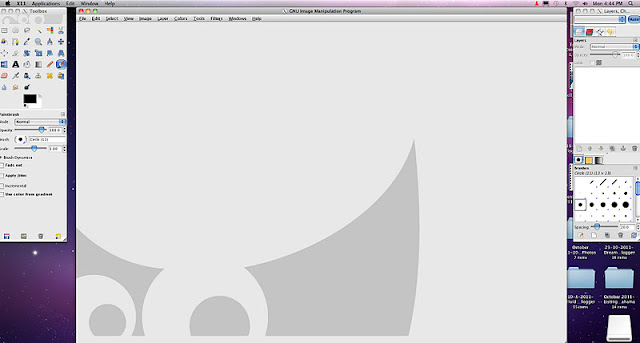
The GIMP OPening Window


How an Image Looks When  OPened Up

The Left-Sided Menu Presented in Rectangular Format

The Menu as it Appears Normally on the Left Side of Your Monitor


The Copy and paste Icon
(The Rubber Stamp in Photoshop) 

A Round Shape for Removing or Moving a Part of the Image

The Brush Menu and Sub-menu Functions

Another Brush Menu 


One of the Menus in GIMP

The top Menus and a Sub-Menu

One of the "Fun" Sub-menu functions


A way of whitening the foundation (What the item is on) with a special sub-menu or function.
It works well! 


The Filters Menu and Sub-menu
Above, I'm sharpening 1 of my images.


I don't know if there is another way to view the folders and files, but if this is it, 
it's "a slight" inconvenience. Once toy have the file (in writing), you can press on the right column and you'll get a photo.

One of the Sophisticated Menus
You may need to read the notes that you downloaded to know what to do, or you can "play around" with the sliders on the left and see what happens.

Accessing the Curves Menu

An Adjustment Using the Curves Line on the Left.
The lower point on the s-shaped curved  reduces the exposure (density), 
while the upper point increases the contrast.

I decided to use a straightforward image and distort it.

A menu pops up to show you the new coordinates of any transformation.
You first need to add a few "points" to the image.
From these points, you can then create the "correction" or "purposeful distortion".


Here's the result.

Here is a beautiful building.
It's one of many in an industrial park called "Liberty".
The Perspective Menu
(For Correcting Distortion or exaggerating distortion)


OIf you want to correct the distortion "by hand", you simply place a few points on the image and then move them.

I figured out that to correct the building tilt on the left side, 
I had to move the point (which also has a line component) to a position parallel to the distortion.
This way of "correcting" is different from other programs, but if it works, so be it!


The default  grid has too many lines and blocks out the image of the actual building that needed correction.

What you do to change the default grid setting, is to open up the default preferences.


This is the Menu when you open up the default preferences window.

I changed the grid so there was fewer lines.

I also changed the colour of the grid.
In this case, I found that red was "easier on the eyes" than black.

The correction on the left side.
The right side of the building could use an increase in size.

What I simply wanted to show you is that GIMP is a serious program for someone who needs access to an image-editing software program, but either:

1. Is on a limited budget
2. Only works on images once in a while

Don't forget that you can always download a "10-30 day trial" version of most softwares. However, if you don't really have the time to test out the software, then try GIMP! It's free and it can stay on your computer for as long as you want it to. 

Furthermore:

1. It's quite sophisticated,
2. Has resourceful help documentation (although I didn't use it much)  
3. It's free!

4. Once you work with it enough enough and familiarize yourself with it, you can then download other image-editing softwares to "try out". In this way, you'll have some experience to compare and contrast different company softwares.


Sunday, October 23, 2011

Perfect Resize by OnOne

Monday, October 24, 2011


Perfect Resize 7
by
OnOne
   
     Perfect Resize 7 is a software program that is supposed to allow you to enlarge and increase your image and file size without any (degradation) of quality.  What this simply means is that you can try and make the size of the image larger without having any loss of quality or detail  from the original smaller image.

    I decided to try this software from OnOne to see how it would perform. I know already from experience that you can only enlarge an image so much, and that if the image is small and does not have good details, you simply cannot expect the results to be any better.

The Logo

The Perfect Resize 7 Folder


The Plug-in Files (From the Plug-in Folder)


I tried to install the plug-in into Photoshop CS5, but that didn't work, so I had to work with the freestanding program!

Here's the original size of this file.
When taking a photo, digital cameras use a small pixel/inch ratio 
with a corresponding large sized-image.
I think this is because it's faster for the image to be captured by the camera.
Later on, in Photoshop, you can always change the pixels/inch as I did below.

The Original Size that I decided to Work From
It's 4" x 6" @ 300 pixels/inch
In metric it's 10 cm x 15 cm @ 300 pixels/inch

I reduced the size form the original in order to see how big I might be able to enlarge the image and still produce an acceptable-sized image.

Just remember, that I didn't make any prints, so I'm judging all images from my I-Mac monitor.

Here is the window of Perfect Resize 7 showing you the actual starting size.

Here is the new size that I want to enlarge the original


Once you click "OK" in the working window, a rectangle will fill up form left to right, showing you how much time is left in the process.

When you are asked to save the image, you're asked for what quality do you want.
For printing,  the 100value is best, while for the Net, a lower value of 75 will do.


The Original Small-Sized Image Enlarged in Photoshop.
It was originally 6" x 4" @ 300 pixels/inch or
in metric 15 cm x 10 cm @ 300pixels/inch

A Portion of the  167.64 cm (16 inches) x 111.76 (10.6 inches) @ 300 pixels/inch


A Portion of the Enlargement Done in Perfect Resize 7

The 2 image enlargements are quite similar.
I assumed this would happen, as the file size had "enough meat on the bone" 
to be able to enlarge the size. In other words, the starting file size had enough information to be able to maintain the finer detail of these toys.

I then decided (below) to prove my hypothesis that:
If you don't have enough of a file size both in terms of size and pixels/inch, you will not be able to get a good enough result.

This is a large-sized image for reference purposes.
it's 6.36" (15 cm) x 4.3" (10 cm) @ 300 pixels/inch.

Here is the same image with the actual data from the program window.

Here is a screen-capture image from a listing that I have currently on E-Bay.
The file size is small.


Here is the same photo with the data window in Perfect Resize 7

Here is the final image enlarged to 6.4" x 6.6" (15 cm x 17.5 cm) @ 300 pixels/inch. 
Notice how the fine detail is being lost.
The program cannot simply add extra pixels and get a good result.
The quality of a print made from this file would not be acceptable!

I decided to "play around" with some of the sliders in the menu on the right side.

"Playing around" did in fact improve the sharpness of the image.
Please refer to the "unaltered image" below.

This is the screen-capture image enlarged to 300 pixels/inch.

There is a noticeable improvement using the sliders on the menu window.
However, the quality is still not acceptable for printing.

This proved my original hypothesis that a low-quality image or a small-sized image
 (both in size and pixels/inch) can only be taken so far in terms of the improvement. 


There's an old expression in photography that says:

"garbage in = garbage out".

Translated, that meant that if you had a poor-quality negative or slide to begin with, you get a poor-quality enlargement. In the DE (digital era), the same holds true. If you have a poor-quality digital image capture, then you cannot expect to get a good-quality result.

Bottom Line:

1. If your subject is not moving use a tripod!

2.  If you're doing portraits without a tripod, then use a faster shutter speed with an adequate f-stop (lens opening). If need be, then set the ISO higher (e.g. from 200 to ISO) to gain 2 faster shutter speeds.

3. Take plenty of photos. It doesn't cost anything.
It's not like the film era when each exposure would cost between .50 cents - 2.00 depending upon the nature of the film and the size of the film format.

4. Try to come as close as possible to fill your image area as big as possible with your scene or person.


To Be Continued....
I will expand on this program to use the adjustments as they were meant to be after I learn them and find the time!

As always, thanks for dropping by.