"Masking" is a term carried over from the printing industry, when there were no computers. Special adhesive-backed material would be carefully laid on parts of a photo that were not to be copied for the printing process. When a camera loaded with special lithographic film was used, those parts did not record , thus the term "mask". You can also think of "masking tape for painting", where you add tape to areas that you don't want to paint.
The Software Box
The Screen Icon
What makes Fluid Mask 3 interesting is that it seems to be actually "easy to use"! I'm going to return to this software and update this post, but for now, the material for this portion, was done in about 20 minutes.
I haven't learned the software, but as usual with me, I tried to "play around" with it, and see how intuitive it was. So here we go!
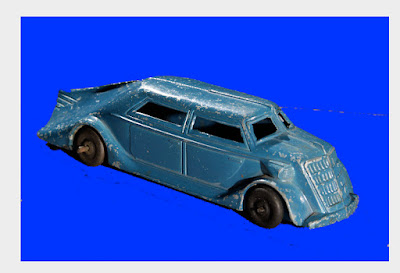
My Starting Image - A Tootsietoy Graham Car
The Working Window
The Left Side of the Working Window
If you've already worked with Photoshop or some other photo-editing software, you'll
most-likely know what the icons represent. I wasn't sure what the differences were between the second and third rows, but I know that "green was good" and "red was bad".
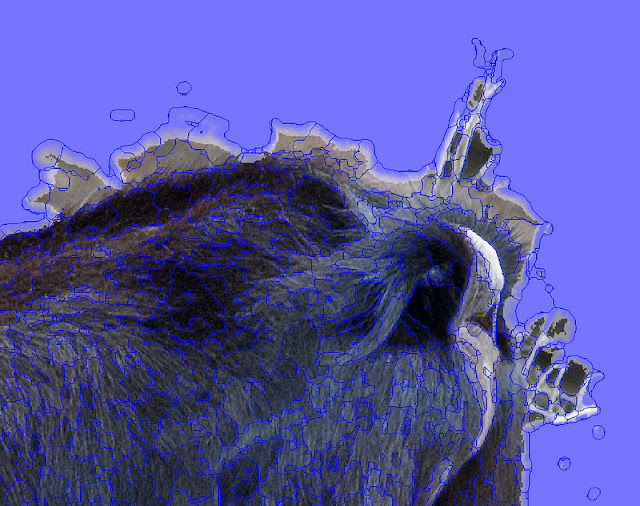
Once you activate the window, you get a series of lines that look like "isobars" on a weather map where areas of equal pressure are all attached together.
With Fluid Mask 3, all equal areas of colour or tone are attached together like "isobars"
I haven't seen this before in a software, and I thought to myself "wow, this is clever!".
You use the red or green tools to choose the areas that you want.
You can use red to "ged rid of" or green to "add".
Red and green are the 2 colours fo r masking
I chose green to choose the areas that I want to get rid of.
The circle with the crosshairs (upper left next to the car) is a tool that is used for adding.
I set it large in order to capture as many "isobar" areas as possible.
Of course, if you make a mistake, you can use the red tool to remove the mistaken area.
Here is 1 area that the software mistook.
Here is another area that the software mistook.
What's interesting about these "mistakes" is that I immediately understood the problems.
The 2 areas are very similar in tone to the surrounding areas, so they were captured.
What's also interesting is that I learned immediately potential problems to look for in future images that I will work with!
Smart!
Make a mistake or if the software makes a mistake, and of course you have an eraser tool.
Yo u have a magnetic lasso (sort of) that is represented by a rectangular marquis.
Therre are 3 options with this tool.
The yellow is the magnetic lasso that I used to outline the "incorrect area.
I will then use the red brush to change it back to "do not capture".
I'll show you htese later on when I return to work on this post.
I have no idea what the above menu is, but I think is a menu to "allow for more subtle selection in terms of similar tones, colours, or shades.
I only worked on 1 small photo.
I went to Photoshop
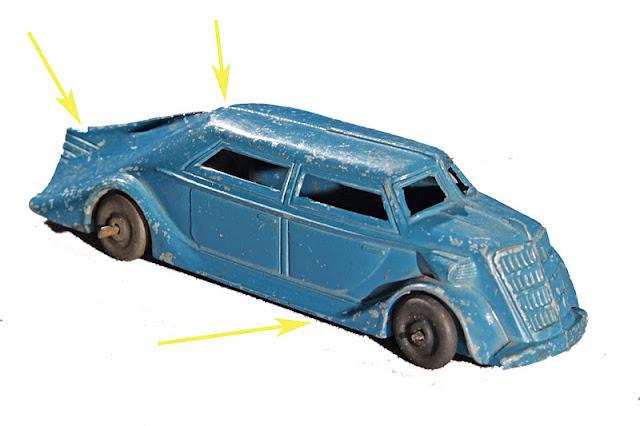
I added a missing headlight
Here's another view in layer mode
The Finished Result in Photoshop
I rushed through this, so the bumper and rear left wheel, and front left bumper/grill show poor workmanship.
However, for 20 minutes of work and learning, I'm impressed at the ease of understanding, working with the program and of course, the quality of the mask.
Second Try
Image # 2
Use the large selection tool for areas that you know will be easy to mask.
Use the small selection tool for areas that you know will be easy to mask
The Overall Capture or Mask
Mask area removed and Item wanted is shown
Image Brought Into Photoshop to Check Out
Time: 5 minutes
An improvement with a new understanding of the large and small-sized brushes.
Third Try
So now I thought I'd try a much harder image. A Maui Goat in a small forest when I was in Hawaii last year for my niece's wedding. These goats were let loose or escaped long ago, and are very numerous now. The problem is that Maui is very hot and dry where the goats are. They are overabundant, and unfortunately there is not a lot of water for them.
I'll leave the rest to your imagination.
A Maui Wild Goat
Masking of a Much More Complicated Subject
This took me much longer, because I needed to find a couple of video tutorials and study them.
I'd give myself a 3/10 for this result. It certainly is quite good, but needs lots and lots more work.
The one thing that I do find with this program is being able to grasp the menu and sub-menu commands in a short time. Personally, I always had trouble with Photoshop. I knew what to do, buy I never quite understood what I was supposed to do. With Fluid Mask 3, you can understand the basic concepts, especially if you study a few video tutorials.
I've only touched upon and used about 10-15% of this program, so I'll have to study it much more to give you a better all-around review. However, for now I'm quite pleases with the program, and it even helps you to understand Photoshop and layers better!
Third Try - Part II
Sorry about the goat's derriere", but that was a "choice spot" to work with!
It turns out that as you adjust the settings of the menu below,
the "isobars" get smaller and smaller.
This correspondingly allows you to use a smaller-sized mask to mask these smaller isobars.
The endo result is the ability to mask finer and finer detail.
Setting # 1
Larger-Sized Isobars
(Please See Above)
Smaller-Sized Isobars
Setting # 2
Larger-Sized Isobars
(Please See Above Photo)
Still Smaller Yet!
Setting # 3
Smallest-Sized Isobars
(Please See Above Photo)
The person against a scenic background/white background command.
This allows you to see the mask/result with this command
Another view against a checkered background
A framed view of your current work.
This is done with the camera icon (below).
The camera icon allows you to draw a rectangle around your work.
This in turns shows you how your masking is looking.
The Result
The Result with Some Photoshop
There are still plenty of commands and menus to refine the final result.
I've brought the goat form an initial self-grading of 3 to a grade of 6.
With more learning, I'll go after that 10/10!
Please have a look at the Fluid Mask 3 site!


No comments:
Post a Comment