Sunday, December 11, 2011


A second Instalment for Sunday
Photography Lighting - Building up Your Light
Google's blogger seems to have a limit on how many photos that one can add to an instalment, so I am continuing here with the rest of the instalment for today. The photography term "building up your lights" simply means to think things out beforehand. I'l show you what I mean in another instalment, where you plan things out in writing before you go into the studio. For today, we'll assumne that I had the "plan" and I'm following it.
I like to work with a minimum of 2 lights. I'd work with more, but I'm using a small part of my basement, and that takes up room. My wife seems to be tolerating that!

This is my starting light. It's called a "main light" or key light", with the word key meaning most important. It's at 11:00 P.M. or WNW or 335 degree. In language, it's hight, to the back and to the left of the Hubley 1950's steamroller.
I placed the light there because it backlights the subject and creates depth.

This light is called a "fill light". What it does is adds light into the shadow areas that are too dark.
There's nothing wrong with having an area too dark if you're shooting for yourself. However, commercial-wise (product or person or fashion) you need adequate detail in the dark area for printing purposes for magazines or brochures.

Here we see both lights on together. The problem here is that the "fill light" is stronger than the main light. The effect of depth has been lost. I could change the position of the 2 lights, but that takes time, my walls are getting marked up already, and moving these fragile quartz bulbs may break the element in the bulb. At $ 9.00 a bulb, you learn very fast to not move these lights unnecessarily.

Here is a photo with a BIG MISTAKE!
I didn't raise my fill light high enough. As a result I have 2 shadows in the photo from 1 object!
The error here is that all studio lighting or outdoor lighting (fashion)
is based on nature: 1 sun and 1 shadow.
Further down, you'll notice that I raised the fill light higher, so it's shadow fell behind the toy and was hidden from view.
So what I'l do is simply to use the filters that I made in the previous instalment. Those ND (neutral density) filters in the Kodak Gelatin Frames.

The 2 lights on
The problem is that the fill light is too strong, and eliminates the effect of the main light.

The 2 lights on.
The fill light has a .3 ND filter or 1 -f-stop is being blocked.

Here the fill light has a .6 ND filter or 2 -f-stops of light are held back.
This looks quite good.

This is the result with a .9 ND or 3-f-stops of light blocked.
It's too dark!
For the rest of my lighting "build-up", I'm going to use reflectors.

A front reflector was added to add "shine" to the front roller of the toy.
An additional reflection was added to the back left large wheel.
I like to use scrap pieces of wooden blocks to support the reflectors.

Here's the toy without the reflector in the photo.

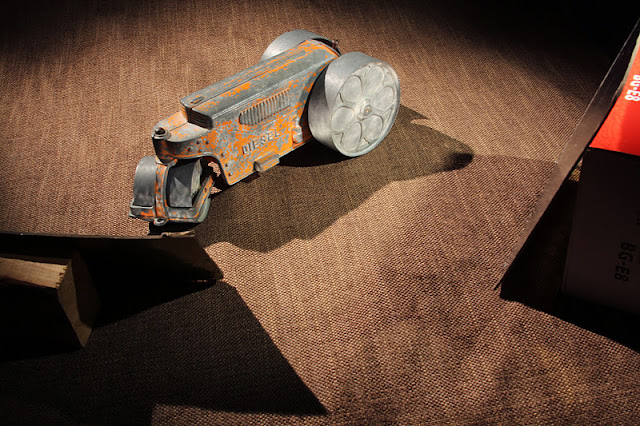
I'm low on wooden blocks, so I used one of my Canon Boxes.
Bad move! It could send red light to the toy and discolour it.
In the pro studio wood blocks are painted black.
Anyway, this reflector adds a nice highlight to the rosettes (flower shape) of the wheel.

Here are the 2 reflectors together

Here's the steamroller without the reflectors in the photo.

Think of the game of pool or billiards. You need to choose a point on the bank and aim the cue (white ball) at the coloured ball. You then imagine the angle that the coloured ball will bounce off.
It's the same with lighting and a reflector. You catch the light from the light source, and "bounce it" on to the steamroller.
One most important factor here is to always view the light from the camera height, angle and position.
This definitely means to use wood blocks to have the reflector stand by itself. If it slips, there is something called "Fun Tac" which is a sticky putty that is safe to use, and will hold your reflectors to the wood blocks.

I added another reflector from the top.
This gives the wheel large back left wheel an extra reflection, which is turn gives the viewer the "illusion" of roundness, and depth. I specifically mentioned the word "illusion" because the CCD of the digital camera (before it was film) is basically a 2-dimensional medium. You need to create highlights and shadows (dark areas) and different intensities to bring out that third dimension!

My final touch was to use my "Maglite" flashlight to add an extra highlight to the large rear left wheel, as well as to add more exposure to the dark fabric.

Here's the final image
Here's the starting image.
It's not really that complicated not time consuming. Furthermore with the digital camera, it's easy!
Try it, you'll like it!
No comments:
Post a Comment