August 27, 2011
Photoshop - HDR (High Dynamic Range)
I'm going to be blogging both about software and skills when it comes to professional photography.The profession has changes in the DE (digital era) and the software available to photographers is sometimes just as important as the photograph (image capture).
Today's instalment has to do with something titled HDR which is an acronym (abbreviation) for High Dynamic Range. In a simplified explanation, HDR means the wide difference between the bright areas called highlights and the dark areas called shadows, both of which are photographic terms. In the days of film there was a term titled "film latitude". This meant how much detail (image information) a particular film type could record or capture (expose) on the film. Slides (transparencies) had less latitude than colour negative film which had less latitude than black and white film.
A question that used to be asked often by non-professionals was "why can't I photograph what I see?". The answer was that your eye has the capability of seeing a wider range of tones (latitude) that what the film could record. What professional photographers would do to reduce the latitude was to add flash (flash fill), reflectors, or supplementary lights (indoors). Of course, this only worked on small set-ups under controlled scenarios. Obviously, you couldn't do this with outdoor landscapes!
Photoshop is one of the foremost digital image editing software, and continues to modify and enhance their product year after year. 1 very good feature is what I've been talking about called HDR. What Photoshop has done is allow the photographer to capture different exposures of the same scene and then blend them together to get better detail in the highlights and the shadows. However, you need a tripod (for absolute exact image angle and size), and the same f-stop! You simply keep the same f-stop (lens aperture) and change the shutter speed. Also, it helps not to have anything moving in the scene, so windy days or lots of movement from cars or people doesn't work well.
So let's start and I'll explain what happens.
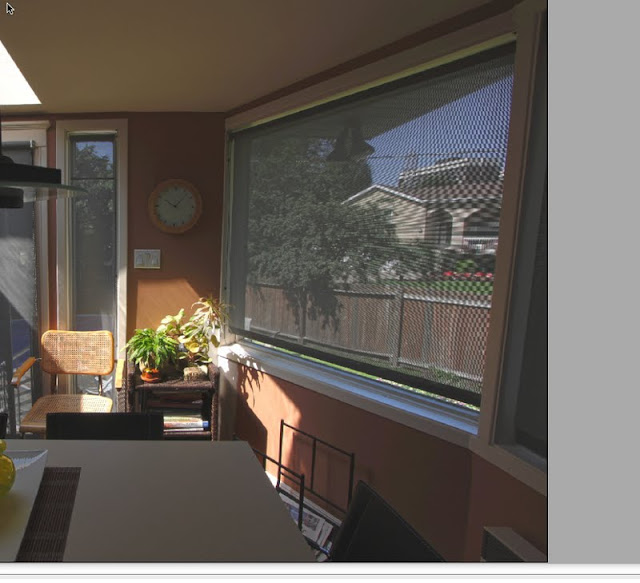
1. A Series of Bracketted (Over and Under Exposures) Images of Our Sunroom
The above scene illustrates that there is a high contrast. This means that the brightest and darkest areas are extremely bright and dark. A low contrast scene would be one where this scene had light form a cloudy day. The clouds would hide the sun and lower the contrast.
HDR or High Dynamic Range only works so far! However, it's getting better and better, and so are the digital cameras. I read about 3 months ago, that HDR will soon be incorporated into digital cameras! Also, I personally prefer to work with fewer images than more.
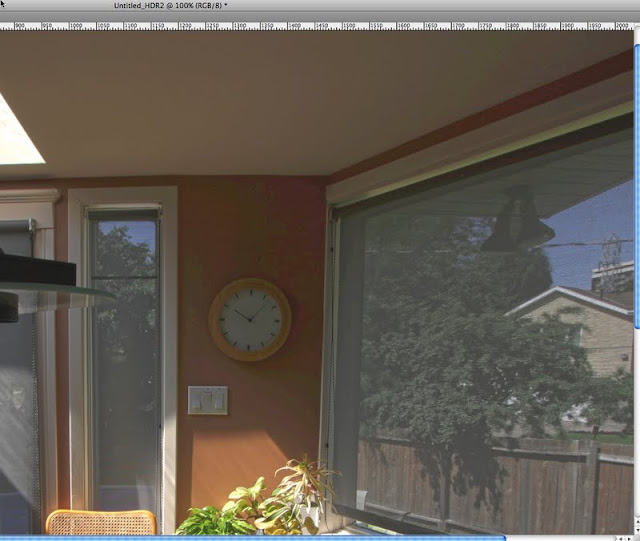
2. The above image shows why I prefer to work with less images than more. The above HDR image close-up was from 7 bracketed images. Notice the shadow areas above the wall clock. This is called
"noise" or undesirable pixilation.
If you can't see what I'm writing about, you can click on any image to enlarge it.
This will better show you the detail.
The photography that I do is usually controllable with reflectors or flash fill, so I don't really "experiment" with HDR to use it as the "final saviour"!
I like to provide as much detail as possible, so I will intersperse my instalments with other information.
If you're only interested in the HDR, simply follow the number sequence 1,2,3...
The upper left menu illustrates how to hide the bottom dock with the software that I am using (e.g. PHOTOSHOP, SAFARI, SNAGIT, WORD, ETC)
Here is an enlargement to show you how to get rid of the dock.
I gor rid of the dock so I could enlarge the files for easier enlargement.
3. Above are 5 bracketed images that I will work with.
A well-exposed image is one that is exposed well for the highlight details.
That means that image information and texture are there.
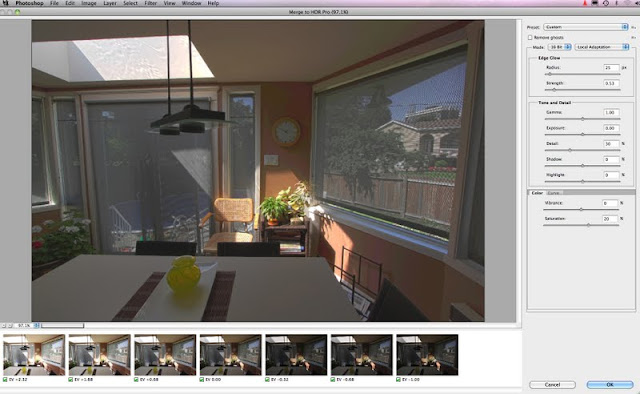
4. The window capture for HDR:
File>>>Automate>>>>Merge to HDR
5. Menu from where will you be taking the images for HDR?
6. The source for the HDR are from the already-open files
7. The result
8. A menu to work with after the HDR is completed
HDR will surely improve your image than had you not used it. And the menu above will move the improvement another 25% better than the original imagery. However, it can't produce miracles! So you'll have to live with some compromise!
9. When you activate the menu on the right, you'll notice that it has some data specifically recorded.
You need to remember this, because if you press the "cancel command" you are going to lose your HRD image! I think there is a way to "undo" the changes, however, I haven't found it yet.
10. Here's a sampling of data that I've adjusted for the HDR image form the adjustment menu on the right side of the computer screen.
11. Here I've reduced the highlights or "compressed them".
12. A repeated image of a 7 image HDR
13. An HDR image with only 3 images used.
There is less noise above the clock, but you'll need to click on each image to magnify it to see the differences for yourself.

14. An enlarged detail of the 3 image HDR.
15. A single image of the HDR exercise presented for reference
15. An adjustment for highlight and shadow improvement
16. A curves adjustment
17. When the HDR image is processed, it becomes a Photoshop document
18. You can then rename the file and save it as a Photoshop or JPEG document
Below is a glossary of some of the terms that I've used today. This will hopefully assist you with learning the terminology, and facilitating your understanding of what I am writing.
Low Dynamic Range: A term describing a photo image that has a small spread of bright and dark areas. An example would be on cloudy day.
Film Latitude: A term describing the span of bright and dark tones that can be "captured" or recorded by film. In today's digital era, the term would most likely be the CCD latitude.
CCD: Film Latitude: A pixel sensor behind the mirror of you DSLR. Millions of these CCD's help create the final image. The analogy to film would be the actual grains of silver-halides. The total number of pixels is then presented as "a 21.4 megapixel camera", with the 21.4 being in the millions.
Highlights: The photographic term for the bright areas of a scene.
Shadows: The photographic term for the dark areas of a scene.
Highlights: The photographic term for the bright areas of a scene with detail.photographic term for the actual visible information in a scene. There can be no detail in shadow areas, or no detail in highlighted areas.
Blown-out highlights: The photographic term for describing so much overexposure in a highlighted area, that there is no detail whatsoever there!
High Contrast: A scene where either the lighting, the content, or both combine to make a wide difference between the brightest and the darkest areas of the scene.
Low Contrast: A scene where either the lighting, the content, or both combine to make a narrow difference between the brightest and the darkest areas of the scene.
As with my other blog http://oldantiquetoys.blogspot.com/
I invite people to comment or correct me should I have made an error. You can also write to me if perhaps, something needs to be rewritten.
Have a great day or evening, and I'll hopefully be continuing tomorrow.


No comments:
Post a Comment