Thursday November 24, 2011


 Image 3:


Photography Tabletop Lighting Revisited
When I taught professional photography, few students after 3 years presented portfolios on tabletop photography. Granted, this area is not for everyone, but because this area is relatively "quiet" and non-personal, most students sought the realm of people-oriented (portrait, fashion, documentary). However. there was plenty, if not more opportunity in tabletop and commercial product photography. However, I had to respect their wishes.
The second observation after the above comment, is that most people can easily spot a nice tabletop, but think they can't reproduce it. Wrong, wrong, and wrong. I used to emphasize to no end, that it's the lighting of a photograph that provides one of the key elements to the "shot".
This small Hubley cast iron cement mixer arrived today, and I photographed it. I'll be saving it for those free 50 listings at either the end of November or at the beginning of December.
Below is a step-by-step explanation of how I got the final image for E-Bay.

The Fnished Hubley Cast Iron Cement Mixer
for E-Bay December 1, 2011

Image 1
This is called the main light or establishing light.
This lights creates the mood, or in this case a 3D effect.
The main light is high and to the left

Image 2:
This light is called the fill light.
It provides illumination into the shadow areas.
It's important to place it in a position where it will NOT cast a second shadow or
have the shadow be strong!
We live on a planet with 1 sun which casts 1 shadow, so
photographers try to keep this simple "law" in the studio.

Oh, oh!
Notice the 2 shadows!
A Big mistake!
But when I frame the image tight, the 2 shadows are a smaller "error".
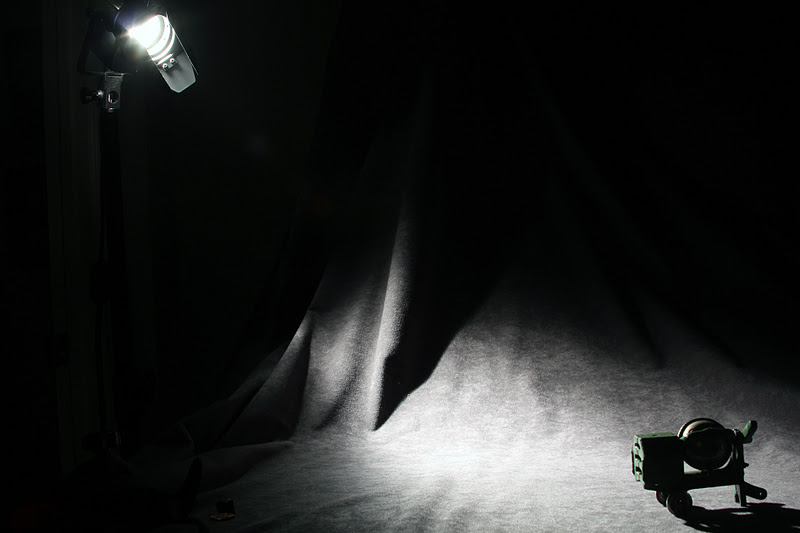
 Image 3:
This light (in this case, a silver reflector) is called a "kicker" or "accent" light.
In the tabletop photo above, it's adding an extra "highlight"
to the left grillwork side of the cement mixer.

You need supports for these reflectors, so I usually grab whatever is at hand.
However, the best thing is blocks of wood.
All you have to do is go to the local hardware store or lumber yard and ask for waste or scrap pieces!

Image 3:
Another "kicker" or "accent" light was used.
It's providing more light to the dark shadows areas, as well as adding some more highlights.

Something to note here is that I used a long focal length lens or a zoom lens at its' longest focal length.
This does 2 things:
1. Avoids distortion (altering the actual dimensions of the item)
2. Allows you to come in close and eliminate the distractions, which in this case are the reflectors and their supports.

Another mistake or rule that I broke - Never hand-hold a reflector or light.
The reason for having a clamp with a stick hold the reflector is that:
1. It frees toy from accidently creating and shake of the table
2. You can always get the exact same result!
The exposure was for only 1.3 " (seconds) @ f 16, but look at how much my hand shook, even though I tried to hold the reflector still.
An obvious question that you most likely have is this:
"Where did I get those reflectors?"
I like smoked salmon (lox), and the slices of smokes salmon come with the "free reflector".
However:
1. Use Alcoa aluminum foil and glue it to corrugated cardboard.
2. Go to almost any graphic design store or art supply store and see if they have sheets of shiny silver in 32" x 40" sizes.
Buy some "foamcore" (foam in the middle and outsides are white).
This is excellent for gluing the shiny silver sheets to it. However, this is expensive.
Better to stick with the the first choice (make it yourself with readily available materials).
In the future, I'll be continuing with lighting, because as I said, lighting is one of the most important elements to any photograph.
No comments:
Post a Comment