Thursday, January 12, 2012


Corrected in Photoshop


 Corrected in Photoshop
 Badly Underexposed

 Underexposed
 Corrected in Photoshop
The above 2 car series illustrates how Photoshop can help with photos
that were underexposed or overexposed.
I did a "fast fix", so my corrections my not be 100%.
The bottom line though is to always take the proper exposure or bracket.
You can always correct later, but you may not be able to return to the original place where you took those photos!
So thanks once more for dropping by.
Have a good morning, good afternoon, or good evening,
wherever you may be.
More About Lighting
Lighting is the most important factor when taking photos. It's understanding of lighting that separates the professionals from the amateurs. It's not all that hard to understand, but it may take some time to improve your photos.
While talking about lighting, it's important to also understand that Photoshop or any other image-editing software will not save badly-photographed photos, especially in terms of the lighting.
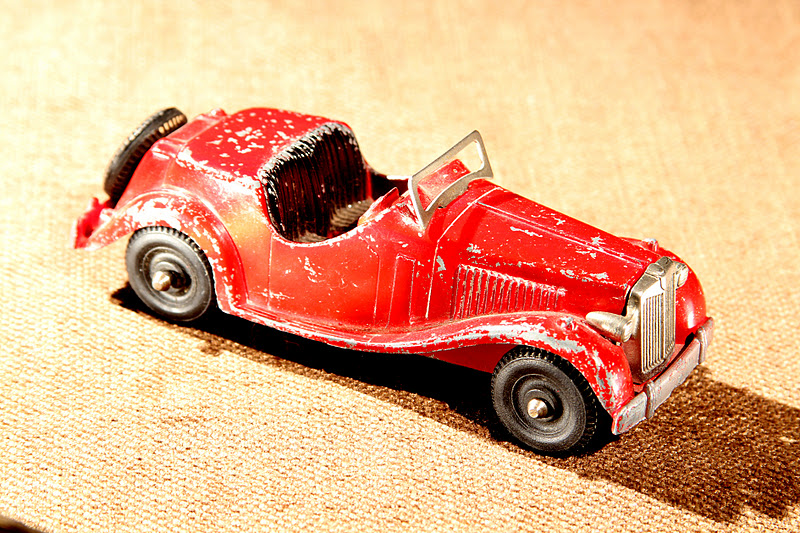
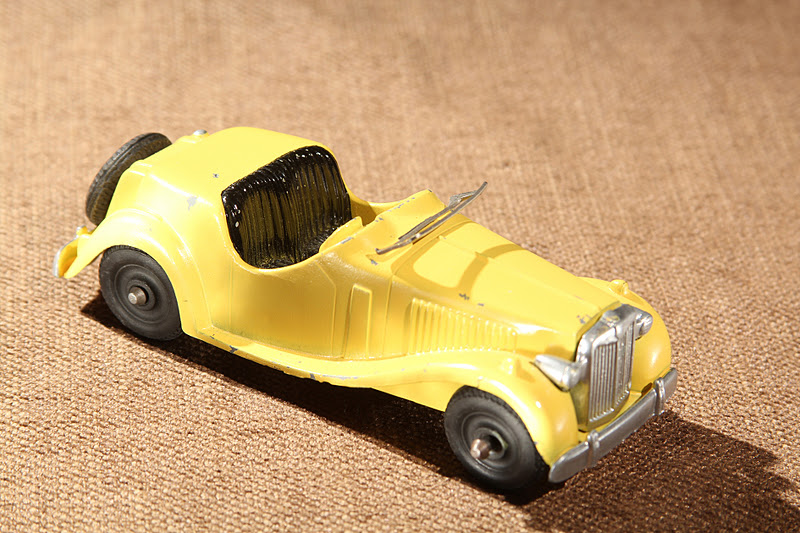
For today's instalment, I set up a series of exercises with 2 cars. 1 is a canary yellow (bright) and 1 is a cherry red (dark). LIght does 3 things upon falling on earth, a landscape, or on a car.
1. It reflects to the camera, and that's how the photo is captuired. You are capturing reflected light.
2. It gets absorbed by the subject. That's why the red car is darker than the yellow car. Yellow reflects more than red, so the yellow car is lighter (brighter) than the red (darker) car.
3. Lighting can be transmitted through a subject (e.g. glass). However,we're only conerned with ! & 2 for today.
Exercise 1
The Inverse Square Law or the Law of Inverse Square
I'll explain the Law of Inverse Square in a future instalment, but for now what the law simply means is that the closer an object is to a light source (studio), the brighter the light intensity will be on it.

The cars are very close to the light.
The same exposure settings were used for all 3 images in this exercise.

I used this exposure as the "normal one"
The cars are farther away from the light source.

The 2 cars are farthest away from the light source.
Notice how there is less light the farther away form the light.
Exercise 2
The Main Light and the Fill Light
In the studio, you try to duplicate light from the outdoors. There is the MAIN light that creates the effect (position, harsh/soft and so forth), and there is the FILL light that adds light to the shadow areas.
The reason for a FILL, is that the camera and your eyes do not "se" the same way.
Your eye is able to see the detail much better in both the bright areas (Highlights) and the dark areas (the shadows) than the camera can.
So, photographers add a second light, called the fill, to add detail into the shadow areas.
Depending how much you add creates what is called a "ratio". A ratio is simply a comparison of the main light amount, compared to the fill light amount. I will explain that again, but for now here's some simple analogies (comparisons).
1 man weights 400 pounds, and another man weights 200 pounds.
Their weight ratio is 2:1. This means that the heavier man (main light) is 2 times heavier (brighter) than the less-heavy man.
1 man weights 400 pounds, and another weights 100 pounds.
Their weight ratio is 4:1. This again simply means that the heavier man is 4 times heavier than the light-wieght man.

This is the MAIN LIGHT.
It set's the mood, direction, texture for the cars.
However, by itself, there is too much contrast, and you cannot record (expose) detail or information in the dark areas - called the SHADOWS.

This is the FILL LIGHT.
It adds light into the dark areas (*as well as the light areas).
It then allows a photo or exposure to be taken that will record detail all over (dark and light areas).
What you try and do is to position the fill light, so that it does not create its' own shadows- that's the job of the main light!
Of course, if you're only working with 1 light (inside your house or outdoors (the sun) , then ypou will use reflector cars to act as the "fill light".

The overall effect that you want (strong or soft shadow detail) is created by how much light you want to badd from the fill light (or reflectors).
The above image has a lot of fill light, so the contrast (difference between bright and dark areas) is less than the images below.

This image has less fill light.
The effect is easier to ee on the red car than the yellow one.

This image has the least fill light.
Look at the groove texture on the side of the hood of the red MG car.
THis is because the shadows of the grooves are darker from less light, hence the texture shows better.
I could have pulled my fill light farther back, or used a ND (neutral density filter) to reduce the intensity of the fill light even more, but I stopped here.
Exercise 3
The Foundation (What the object is sitting on)


What your item sits on also affects the exposure of the toys.
I gave the exact same exposure to all 4 images, yet the image on black is underexposed, while the image on the white is overexposed. The top 2 images (burlap and grey fabric) are OK.
You camera set in automatic mode might correct the differences, but in Manual mode, you can plainly see the results.
Exercise 4
Underexposure and Overexposure,
then correcting with Photoshop
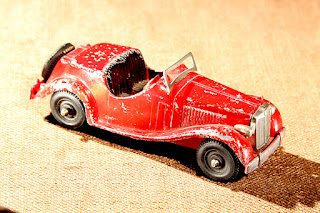
DARK OBJECTS

Underexposed
 Corrected in Photoshop |

Underexposed

Corrected in Photoshop

Overexposed
Corrected in Photoshop

Badly Underexposed

Corrected in Photoshop

Underexposed

Corrected in Photoshop
As you can see from the above images, Photoshop can help with exposure problems.
What you can do with your camera is simply "bracket". That means that when you see a photo that's important to you, you'll take a series of underexpose and overexposed photos to see which one comes out the best.
On DSLR caneras, you can program your camera to automatically do so.
On fixed lens pocket camera, especially the older and less-expensive ones, you may have to do this manually.
Exercise 4
Underexposure and Overexposure,
then correcting with Photoshop
LIGHT OBJECTS

Underexposed

Corrected in Photoshop
Overexposed

Corrected in Photoshop

Badly Overexposed


Corrected in Photoshop


The above 2 car series illustrates how Photoshop can help with photos
that were underexposed or overexposed.
I did a "fast fix", so my corrections my not be 100%.
The bottom line though is to always take the proper exposure or bracket.
You can always correct later, but you may not be able to return to the original place where you took those photos!
So thanks once more for dropping by.
Have a good morning, good afternoon, or good evening,
wherever you may be.
No comments:
Post a Comment