Saturday, April 13, 2013
Effort # 1
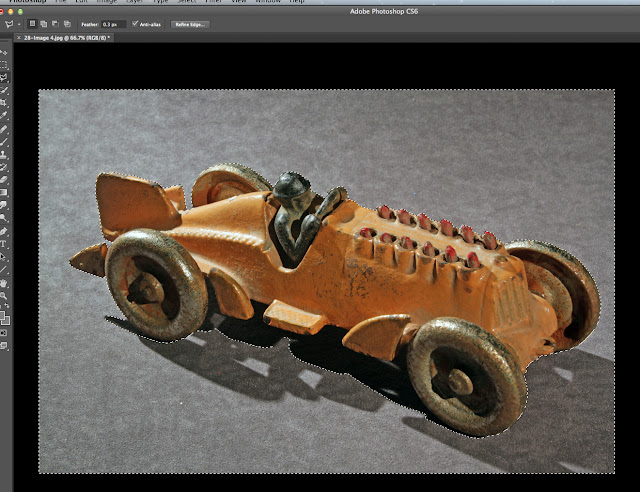
 My Own Sample Photo of How I used to Present on E-Bay

 4. I'll use the Shadows/Highlights command to bring out more detail in the shadows.
I'll leave the highlights alone, since they're alright.
 5. In order to apply the "inner glow" effect", I need to to remove the car form the white background. Thhe reason for this is that the actual effect is ad the outer edges of the toy, so if I don't remove the toy, there won't be any effect that you'll see.


 9. After
This image obviously doesn't illustrate the best result.
I decided to select another image, so the one below is the second try.
Effort # 2
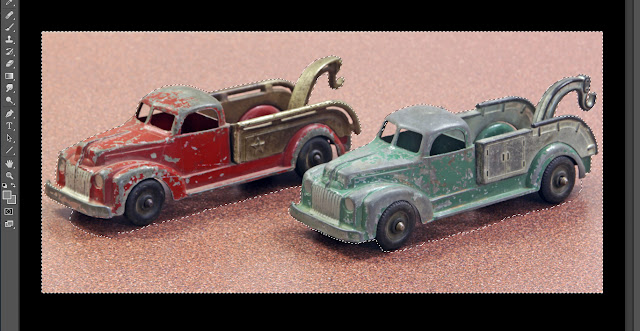
1. I selected the background for removal

 3. Oops!
Very poor work on those tires!
 4. I retouched the tires to have them rounder.
 5. A swith the first effort, I need to select the small truck form the background.
This is because the inner glow "effect" surrounds the outer edges of the selection. If the outer edge is surrounded by white, then you wonlt see the final result.
 6. Above is where you use the "inner glow" effect

 8. The Effect
 9. A before and after comparison
Photoshop - Inner Glow
My other blog on the Net is called oldantiquetoys.blogspot.com (please press the address to be redirected). I write about mostly old and antique toys. At the beginning, I was usingmy own photos, having bought and resold them on e-Bay. I took a break from E-Bay last September (2012), and ever since have asked people on the Net, E-Bay sellers, and outstanding toy auction houses if I might use their photos.
I also asked them if I might improve them in Photoshop, and most allow me to do so. Last week, I was playing around in Photoshop and wanted to see what "inner glow" in photoshop does. I took one of the photos and applied the "inner glow" and was surprisingly pleased with the result.
Not only did the effect add a certain ethereal (halo) effect, but it cleaned up some of the parts touching the areas that I normally cut out. I do this in order to place the toys against a totally white background. I found about 4 months ago, that this is the best way to present a toy. That is to say, extract it from any background distractions, and show only the toy against white.
The Technique
Effort # 1


2. I'm going to remove the background
You can use whatever Photoshop command that works best for you. In the above example, grey does not work well with many of the selection tools, so I have to "slog it out" by using the magnetic lasso. I then refine the edge and smooth the edge out for a cleaner separation of the toy from the background.

3. Here's the result

I'll leave the highlights alone, since they're alright.
I only improved the shadow detail a bit.


6. Here's the toy copied and pasted to a new file

7. Here's where the inner glow command is located.
There are some controls there, but I usually find the default setting fine.
After that, there does not seem to be much furhter enhancement buy moving the slider control to the extreme end (right side).

8. Before

This image obviously doesn't illustrate the best result.
I decided to select another image, so the one below is the second try.
Effort # 2

1. I selected the background for removal

2. Obviously the remaining foundation is unattractive.
The word "foundation", for those who don't know, simply means what an object is resting on .

Very poor work on those tires!


This is because the inner glow "effect" surrounds the outer edges of the selection. If the outer edge is surrounded by white, then you wonlt see the final result.


7. That's the menus for changing the effect.
I usually stay with the default setting that you see. Nothing more seems to happen in you increase the effect. Of course, I'm using this tool against white. I'm sure against a contrasting colour or darker background will show better.


If you want to see plenty of images with the inner glow effect, please visit my toy blog (www.oldantiquetoys.blogspot.com)
Thanks for visitng,
and as always,
have a great part of the day,
wherever you may be.
Stacey
This comment has been removed by a blog administrator.
ReplyDelete