Wednesday, March 21, 2012

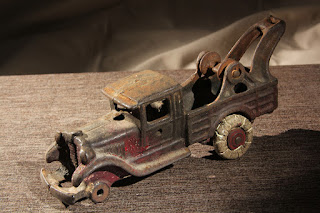


 The final "improved"photo
Photoshop Layers
An Introduction
(Any Image Editing Software will have this feature)
It's hard to imagine what photography would be like without the digital camera and image-editing software. I can though, and I thought digital would never succeed as much as it did! Now, I can't see photography and Photoshop not being here! And I'm 63!
One of the great features of most image-editing softwares is the ability to do all sorts of interesting and functional enhancements to an image. One of these enhancements is the ability to take the features of 1 photograph and then them in another photo. The example that I'll demonstrate today requires 2 identical photographs of size, camera angle, and f-stop.
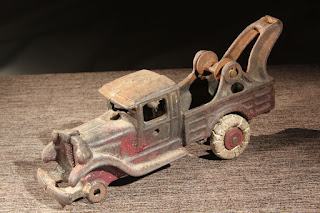
I have 2 photographs of the same toy. However 1 of them is too dark in the front of the truckbut has nice lighting. The other has flat lighting, but has good detail in the front of the truck.


What a layer is is exactly what the word means. It's the same as 2 layers of paint or having a chocolate cake with white and dark layers. In Photoshop, I can do the same thing, that is, to have 2 or more layers compromised of photographs.
What I'm going to do is:
1. Make a new image having 2 images of the same truck
2. This will be done by creating a new layer to accept the new photograph
3. Move 1 photograph to the new layer
4. Erase the dark area from 1 photograph to expose the detail of the front car having better lighting.
Because the 2 photograph will lie in the exact same position as the other, I can simply use an eraser, another tool in Photoshop to erase the dark area of 1 photo, and then allow for the underlying better-exposed layer part to be seen.
Don't worry, if I'm talking too much.
The step-by-step process below will allow you to easily understand what I'm going to do.

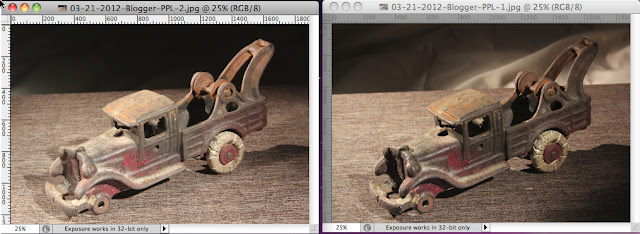
Here are the 2 photos that I'm going to work with

1. I'm using the photo of the truck that is too dark in the front-
I'm going to add a new layer to this photo

2. Now I go to the other photo and do a "select all"

3. Then I copy it

4. I go to my other photo (too dark in the front)
Notice that the new layer is blank (checkered grey and white squares)

5. I paste the copy of the truck photo that is lighter in the front
to the layer of the other photo that is too dark

I This is the Layers/Channels/Path window to the lower right on my Photoshop window.
Notice the before (left) and after I paste the photo (right)

6. Now that the 2 photo are 1 on top of another, I am going to erase the front of the truck layer that is too dark,to let the lighter part of the other layer truck to appear.
(The above menu is found on the left side of my Photoshop Window)

This is the top menu window for controls of the eraser.
You can make the eraser bigger or smaller, adjust the shape of the eraser (Brush), and the opacity (how much you can erase).
I don't bother much with the "flow".

Here's the result

7. I now have to flatten the image.
This simply means that I will merge the 2 photos together

8. I now have to save this new photo
 The final "improved"photo
Thanks for dropping by, and have a good morning, afternoon
or evening, wherever you may be.
No comments:
Post a Comment