Sunday, November 4, 2012

The Magnetic Lasso - Part I (Photoshop)

Sunday, November 4, 2012
Daylight Saving Time Starts


Taking the Pain Out of Learning Photoshop
(The Magnetic Lasso - Part I)

    First of all, I want to thank the few of you who have visited this blog or who have continued to drop by. I was frustrated at the few viewers who have visited. However, if I want to have more viewers, I will have to keep working to make the blog better, with more posts, and keep on working!
 So, I've come back to this blog, and I will try and add loads of posts from now on.

   I've always had trouble with some of the Photoshop menus. I bought lots of books, tried to find blogs on Photoshop, went to Adobe-Photoshop for help and tutorials, and I was never satisfied. I felt that the writer went too fast, or missed small detail, or wrote poorly. When I taught, I wrote books, and for the few who did read the books, I'm sure they were very appreciative and learned a lot.
My previous posts were written with that in mind, and I will continue to do so.

   For those who do read this blog, please feel free to send me suggestions, corrections, or topics  for future posts. I'm not an expert on Photoshop, by all means, but I'll try and learn what you'll ask.

   The magnetic lasso is found on the left side of the main Photoshop window. Of course, you can rearrange the window, but I've always left that menu there. 

   The magnetic lasso allows you to "capture" a part or a whole item in a photo. When you "capture" something, you can then use it somewhere else. Maybe the background is distracting, and you want to use the car against a simpler background with 1 solid colour.

A Toy Photo (J.Chein) That I will be Working With


The Magnetic Lasso

There are 3 tools that share the plave where the magnetic lasso is.
(I'm only going to talk about the magnetic lasso today)


The Adjustments for the Magnetic Lasso are Found at the Top Horizontal Menu
They Appear when you  Avtivate the Magnetic Lasso.


Notice that I've set the "width" to 10 px (pixels)
Setting a lower number will make the small  magnetic points or squares farther apart.


Notice that I've set the "width" to 50 px (pixels)
Setting a higher number will make the small  magnetic points or squares closer together.


"Frequency"  means how many of those tiny squares will be laid down as you move the mouse.
For finer detail I use a higher frequency number.

For finer detail (Smaller part of a photo), you can enlarge the magnification.

You stop the work with the magnetic lasso, and then enlarge the image.
(Control + on a Mac).

When you are finished, you can shrink the size to what you were working with before.


 Nothing works 100% in Photoshop.


You always have to make adjustments or refine the tool.


#1: I couldn't see in the shadow, so I purposely placed the magnetic points farther away.


#2 &  #3:  The magnetic lasso doesn't always place the small squares where you want them.

Inthe cases of #2 & # 3, the capture was either inside or outside where I wanted it.


Below, I've enlarged the 2 points that I am talking about.


As with most of Photoshop, there are always alternatives.


I could simply have went backwards as I was placing down the magnetic points. 

I'll explain that later (after supper).


2 points that did not magnetize properly!


Correcting an Error

I mentioned already that Photoshop never works 100%.
In the image above, the magnetic lasso "wandered" off from its' settings, and started to lay down squares in the wrong place.

To correct this, simply press delete on your keyboard (Mac)


Refine Edge

The  Refine Edge menu allows you to adjust the "capture". When you finally come back to your first magnetic square, and then press on it, the "capture" will be complete. At that point, the line of squares will change to marching moving ants of black and white small lines.

However, Photoshop will allow you to modify the capture.  The above menu, can be found at the end of the settings for the magnetic lasso, at the top horizontal menu.


The Refine Edge menu can be opened by cllicking on the Refine Edge rectangle to the right above.


The 2 arrows are pointing to  errors in the magnetic lasso.

The Refine Edge Window after clicking on the refine edge rectangle
at the top horizontal menu

When the menu appears, it will also show you how the magnetic lasso has isolated the "capture" from teh background. Notice how part of the wooden wheel is missing (top arrow).


By adjusting the "Smart Radius" value, the "capture" is moved away.

Notice how the capture border has moved away from the missing part of the wooden wheel.
The bottom front portion of the car is still a problem , although there has been an improvement.

I'm gpoing to continue with the magnetic lasso in the next post. I'm working with CS5, although CS4 and CS6 will work in the same manner. Try following the instructions that I have left here. When I continue with the next post, you will be able to remember what I said, and easily follow the next post.

To Be Continued......

Thanks for dropping by, 

and have a great morning, afternoon, or evening
wherever you may be.

Stacey Bindman


Wednesday, July 4, 2012

The Green Screen

Thursday, July 4, 2012
American Independence Day

The Green Screen

    You've undoubtedly heard of the technique called  green screen, but didn't ever use it, or maybe you didn't know how to use it. Basically, the technique started in Hollywood. The technique is used to "extract" people when photographed against the green screen, and then place them in a new scene.  

    What you do is light the people with the same lighting (intensity, angle, height) as the new scene.  You then film them (movie or still camera), extract them, and then place them into the new scene. So, for example, you could photograph them in the studio, then place them in a gladiator arena, such as in the movie "Gladiator". 

    The reason the colour green is used is that it's the opposite of  magenta, which is a colour close to your skin tone. Thus it's then easy to select the green and then remove the people and their clothing and props from the green.

    You usually light the green at least 2 f-stops brighter than the subjects. For today, I did a fast set-up and didn't set the lights for that exposure difference. Also, whatever area is not in the frame (green), you try and use black material or seamless or black cardboard. What this does is to prevent the green from reflecting light into the areas that are going to remove from the green. Later on, I'll explain and give an example of what I mean .

    For today's example, I used a newly-acquired Hoge pressed steel car, circa the 1930's.

Here's the Hoge Car on the Green Material

You can purchase an actual "green screen" material on e-Bay, or you can buy material from any wholesale fabric store. Most stores where women buy fabric to sew their own dresses will have such material. 

Be sure to go on the net to check out the specific colour of green that you want.
In the above example, the green is overexposed as the car paint was dark, thus the overexposure.

In Photoshop, you'll use the Select >> Color Range Tool

Notice that parts of the car were also selected.

You need to adjust the "Fuzziness" slider to reduce any green colour capture from the use of  the Select>>Colour Range.

As you select, you can also use the + or - eyedroppers to add or remove parts of the selection.


Notice in the above screen capture, how I've adjusted the - eyedropper to further remove the dark green shadow under the car side.

IWhen you make the selection, the side panel will show the colour selected.

You'll need to change that to the regular white, otherwise, when you extract the green, it will be replaced with the same green.

To revert to the black and white colours, just press on the green above.
That will bring up a colour window, whereupon you simply select white.

Here is the "extraction".

It's for sure imperfect, but that will happen.
What I'll do now is simply to do another select>>color range
 to further remove more unwanted green.

Here is the second stage of selecting green for removal.

Better, but still not "perfect".

From here, I could do another Select>>color range.
Instead, I'll simply use the eraser tool to remove the remaining.

The Final Result.

Ugh!  Green Tires

At the beginning of this instalment, I mentioned that you had to add black material,
 black cardboard, or black seamless around areas of the car not in the camera frame.

What this does is to prevent the green material from reflecting green into the car.

That's why the tire is green!

So now you know what the green screen technique is all about.
It's a useful skill to know, but if you're good at Photoshop there are 20 other ways to remove the car from the background.

So to all of my American readers, have a wonderful 4th of July. 

 To the rest of my readers, as always, have a fgreat morning, afternoon, or evening, wherever you are.


Sunday, July 1, 2012

Promoting Yourself as a Photographer

Sunday, July 1, 2012
     (Canada Day)


Promoting Yourself as a Photographer

     The 21st century has become both an asset and a hindrance to photographers. Technology has advanced at an astronomical pace. Being able to photograph with a digital camera, and edit almost instantly certainly  has been great.  However, with the Net, everyone who has a camera can promote themselves as a photographer. Before the digital camera or the Net, high-profile photographers would promote themselves  through such methods as the "Black Book".  The company publishing the Black Book would have photographers buy a page or 2 at about $ 1500-2500.00 US per page. Ad agencies around the world  knew of this book, and they would purchase it.  Consequently, any big agency would know of the "big-name" photographers available for hire.

   The "Black Book" of course has adapted, and is available on-line at http://photographersblackbook.com/


     The Black Book is still a great resource for high-end professional photography, and this valuable resource certainly separates the pro from the start-ups and the amateur. 

    However, there are plenty of opportunities for all levels of photographers,and the Web certainly has made opportunities available to all. In some cases, you might want to build a website, and in other cases, opportunities are available on-line for free.I write a toy blog oldantiquetoys.blogspot.com  and that helps me a "bit" with toy-selling. I also try to take high-quality photos for potential buyers on E-Bay to purchase. 


   When I retired from teaching, I thought of what I'd like to do in  terms of photography. I liked Interior and exterior architectural photography, so I built up a small portfolio of my work. I went around looking for work, but I didn't have any success. I then decided to place all of my photos on 2 free" sights- Picasa and Flickr. I eventually expanded from my space on Picasa from free to 20MB of space for $ 5.00 a year.  I did get 1 job from someone  after I would E-Mail people to look at my photos, but it still has not worked well. I also had American Pickers buy some old toy photos for one of their episodes.

A Sample Flickr Page of my Photos

I haven't taken many more flower photos, buy I have presented them on Flickr.

It doesn;t hurt to present other areas of what you do in terms of photography. By doing this, it can show viewers what other areas of photography that you do besides your specialized areas.

Another Flickr Page of Mine

I load up large-sized images of my work.
I want potential clients to be able to see nice detail of what I do. The downside, as far as toy photos go, is that I have to send e-mails to sites on the Net who have used my photos without permission.

An Enlargement of 1 of my toy Photos.
If you don't know already, you can click on any photo in this blog to also view any photo as an enlargement.

Some of my Toy and Architecture Photos 

Google owns Picasa, which is a Photo Site. 

I purchased extra space on Picasa for only $ 5.00 a year.
As you can see, I have only used 10.08% of my space!

My Nickname on Picasa is Major Trout.

 
I've changed photo styles lately for showing toys on E-Bay

A Sample Page of Thumbnail  Photos on Picasa

 You can view sets of photos by switching to a different view.
All you then have to do is press the arrow on the right, in order to view the next photo.

 A  J Chein Wind-up Old Toy


A  good idea for having people come to your photo sites is to add "Tags".
Tags are words that help viewers find your photos. The above tags relate to the toy photo above.

I don't have loads of viewers visit my toy photo sites, but sometimes you have to wait and be patient.
Antique toys are  a "niche area", so although I had expected more viewers, I only had perhaps several thousand view my toys.

When I'll get more energy to go out and do more architecture, and perhaps food photography, I'll then  use these sites to e-mail to potential clients. This resource, as I said, is "free". It's a good place to start out, especially if you're young, and have a limited budget. 

Moreover, what do you have to lose?

There are also other sites such as Linked-In (Business contact network) and FaceBook.
When I'll find the time, I'll probably expand those 2 sites that I am a signed-up member of.
They're also free!

Thanks for dropping by to view this blog, 
and always have a nice day, wherever you may be.

And if you're American, Happy July 4, and if you're from France, Happy Bastille day (July 14).


Friday, June 29, 2012

Still Another Improved Photoshop - Version CS6

Saturday, June 30, 2012


Still Another Improved Photoshop
Version CS6

     Well, it had to happen sooner or later - another new and improved version of Photoshop. This time it's CS6. To be honest, I don;t use 80% of Photoshop for what I do. However, Adobe, and every other software manufacturer, seem to feel that software has to updated or  changed to a newer and "better" version every year., and Photoshop is no different.

     I did a cursory search for CS6 reviews, and it's the "same, same" everywhere. Writers will take what the software manufacturer provides as a press release, and then just rephrase or rehash the same material. Rarely, do you see someone actually taking the software and going over it 
"with a fine-tooth" comb!

     I will return in the future to look at CS6 in more detail, but for now, 
I just spent about 20 minutes looking for new enhancements.

   The Opening Window of CS6

The window is the same as for CS5. It's gone grey, although I prefer the brighter version of white.

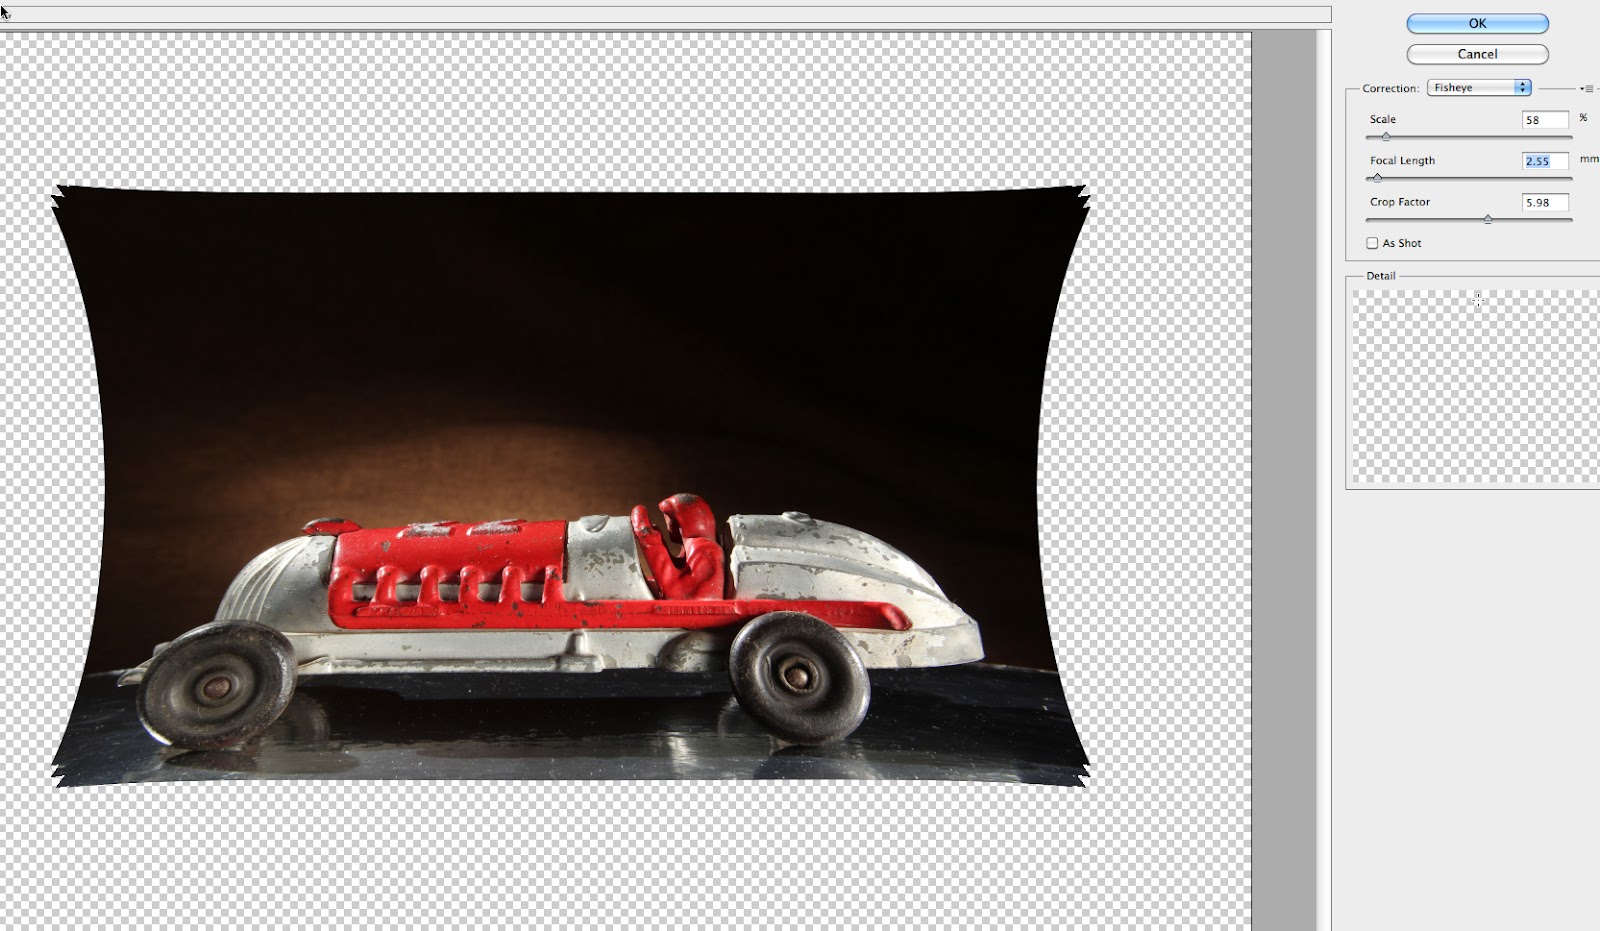
   Lens Correction

This feature is the same as in version CS5, but it's a good start for people working in specific areas of photography such as catalogue, product, or architecture. These areas require tighter constraints on the final image, so avoiding distortion is more critical.


   There are a few new additions to the menu as you can see here from this pull-down menu

   A Correction or Distortion Menu

This menu was here before in CS5, but I thought that I'd show it to you.
It can be interesting to work with, although you still have the "sam old" other menus from much-older versions to work with. 

(Select all>>edit>>Distort)

   I thought that I'd check on "dust and scratches" reduction.
This is a problem that I always have, because I always forget to dust off my subject or foundation.When this happens, I then use the rubber stamp to remove the dust.

I haven't found that  the filter>>Noise>>Dust and Ccratches works well in CS5


The Before Image

The After Image using the Dust and Scratches Filter.
It still doesn't work well!

This is a new feature called 3D
I have no idea how it works, but I'll try and learn what it does and edit this post in the future.
This feature could be interesting.

This is a new feature that can appear on the working screen.
It allows you to access the type menu and change features more easily.

Thanks for dropping by,
and as usual, have a restful weekend, 
wherever yoo may be reading this.